

And so it begins….
As many of you may (or may not) know, I am a big DIY’er and like to tackle most small and even large projects on my own to save money. That coupled with a good solid knowledge of computers about a year ago I started working on updating our 1980’s house to include smart home features.
To start this story off, when times were lean and the markets were still smoldering from the crash in the mid 2000’s, I put my full time entrepreneurial day job (imageProjektions Design Group) on a partial hiatus, joining the daily workforce as a Control 4 installer.
 I took the programming and web development skills I had into a different realm; (which I will tell you did me zero good because Control 4 and other smart home control languages aren’t really programming as we would think). and crawling around in attics, hanging tv’s, and cutting holes for ceiling speakers wasn’t something I really wanted as a career move. The Control 4 programming while interesting wasn’t life changing and the company I was working for S*#ked and I was honestly relieved when I could part company with them and go back to what I love to do most, (make cool things and design stuff for people and businesses to make them highly visible)!
So know you know some of the back story, that home automation stuff was really cool; controlling blinds to open and close at specific times of the day, geofencing your devices so that when you pull into the driveway, a welcome home scene initiates (doors unlock, living room lights turn on, and even the oven turns itself to on or off), and I had the bug to get those things installed for my family.
Enter and Wink…
 Fast forwarding to 2016, I started reading about what was available for my house that not only was budget friendly, but quick to install and most of all easy to use for the rest of the family. In comes the Wink hub and the GE Link bulbs.
This was my first personal foray into home automation, and at the time I started; money was still a little tight, Wink products were not unattainable based on price. I have a friend on the East Coast of Florida who has a fully automated Wink home and he is pretty happy from what I can tell. So I took the plunge and purchased the Wink hub and two GE Link bulbs. In addition I had some lamps that I wanted to put on the automation system instead of having timers and purchased two Z-Wave GE controlled light dimmers.
These were a nice addition because you can control and dim the lights attached and it actually added another outlet to the two outlet component it was plugged into.
Color and Hue…
 Now that we’ve added 4 controlled lights without any major tech issues, the major issue now is light spectrum. Not so much with purchased standard dimmable LED bulbs but with the GE Smartlink LEDs. With my aquatic reef keeping background, I know that color is determined by kelvin which influences the tone of the light emitted by the led bulbs. Being that we are a family used to warmer toned lights the GE bulbs were too white in color and very harsh.
After researching for a few hours, I came across the Hue Bridge and Hue A19 leds. The Wink hub was great because my search for a unified solution (the entire reason I went with Wink to begin with) to control things I added like the Hue Bridge were readily accepted and reasonably easy to add. I have to say that the Hue Bridge and Leds were much easier to pair with than the GE Link bulbs with the Wink hub.
I installed the Hue Bridge and installed the A19 Led Lights and paired the bridge with my Wink Hub. All pretty easy to do, so lets look at the rest of the house!
Shiny, shiny, pretty, pretty…
Now anyone that knows me, I’m a sucker for cool gadgets and slick things with stylish lighting accents and pair this with my need to replace the switches in the house to something I can control, I began researching these light up switch plates that have a no mechanical moving parts; only a touch capacitive glass plate and a smooth looking square led.

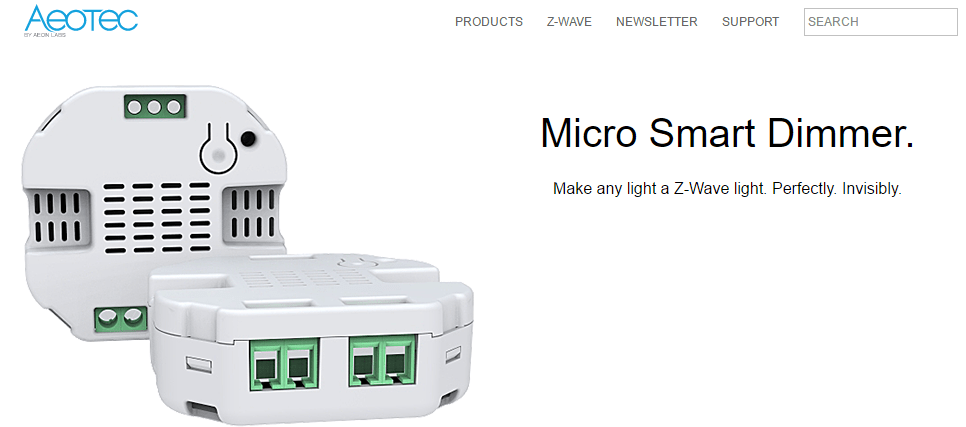
In comes the Aeotec wall Touchglass plates and Z-Wave dimmer add on. Technically with these Touchglass plates you don’t need a controller because the Z-Wave dimmer and the glass are connected together and by touching the dimmer in a short tap initiates the signal to turn on the light 100%, or touch and hold to adjust the intensity of brightness for the lights. The Z-Wave add on remembers the intensity setting (which is good for me, maybe not good for you) and when the single short tap is applied to the switch, the light turns on and goes to that intensity. So far so good with installation on single pole lights, however our house has some crazy wiring, and it’s taking a bit more time to figure out how to put kitchen lights on the same dimmer product and touch panel because the dining lights share common wiring. (Aeotec has awesome support so I may have to contact them again for help.) The product that this company lacks which I wish they had was a Touchglass wall switch for fans. Several of our switch locations combine both fan and light controls. So using the Touchglass switch isnt an option, but I could use a Z-Wave fan switch from GE and another type of Z-Wave dimmer microcontroller that I found for the standard light switch. *** Side note- you must use the Aeotec Micro Smart Dimmer with the Touchglass plates.

These both paired easily with the Wink Hub but unpairing and deleting is not. This past Saturday (April 2017) I received my Vera Plus which I ordered on special from getvera.com. I’ll update this specific section with how easy or difficult it is to pair the switches and microcontrollers with the new Vera Plus.
Installation of the microcontrollers is pretty nifty because, “drum roll” you install the controller inside the junction box and you can use a standard switch (yes a standard toggle light switch) and the microcontroller turns it into a Z-Wave dimming switch with on off capabilities at the switch.
Time to conquer the elements…
Now that we have lights under control (see what I did there- Lol) it was time to move on to temperature and climate inside this project house of ours. At the time I wrote this, I had been looking at Wi-Fi controlled thermostats for about a year now. I had seen several at Home Depot and Lowes, and the price point while not outrageous, was just outside of that comfort zone I wanted to pay money into. Google and Ebay to the rescue, after searching for hours I stumbled across a Home Depot return on Ebay (one of my favorite places to shop!) and bit the bullet and purchased the Honeywell Lyric T5 Wi-Fi thermostat.
 Ebay order placed, thermostat arrives, bam….. No C wire. Conundrum what to do what to do. You can see where my research was lacking on this type of thermostat, and I should have taken off the thermostat already installed and investigated what the wiring type was and how to best conquer this specific task.
Back to the drawing board, because the Lyric I received does not turn because its internal Li-Ion battery is depleted. I’m pretty positive that the lack of a C wire and the quick depletion of the battery causing the Lyric to become an on the wall paperweight was the reason for its return.
How can I add a C wire without pulling an actual wire? Drum roll again! Venstar ADD-A-WIRE! That’s How!
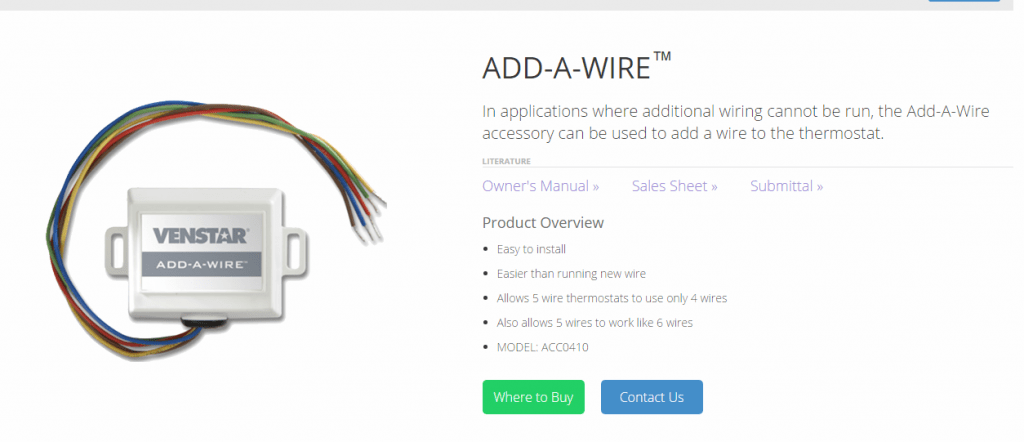
The Video that shows the Add-A-Wire installation seems easy and straightforward, and I have yet to begin the installation of this because I was waiting on the Vera Plus to arrive. The update for this section detailing the installation on my HVAC system will come shortly.!
The grass is a bit greener on this side of the fence now with Vera Plus…
As I mentioned before, the Vera Plus arrived this Saturday, and within 10 min it was powered up and registered with vera with users that needed to be Administrators and users that needed to just turn things on and off. One other note I’ll make now, one of the reasons I went with the Hue Bridge was its support for Geofencing. Only, it doesn’t work at all and I was disappointed… My joy was restored when within 4 seconds, the Vera Plus and Vera App had Geofencing enabled and working on my Samsung Galaxy Note 5 as well as my wife’s.
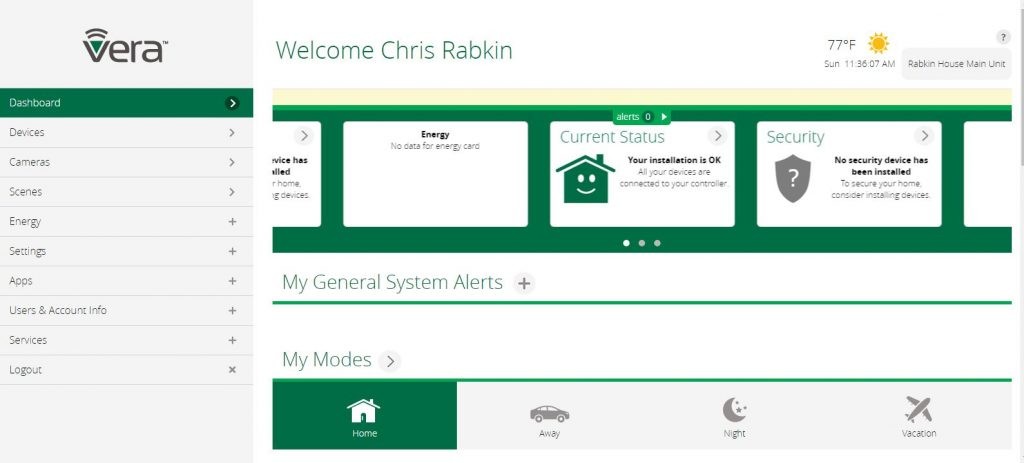
 The Vera Plus is about the size of a small Netgear router, I’d say 6 inches wide by 10 inches long by 3 inches tall. It sits nicely on top of my D7000 Modem/Router and is fairly inconspicuous. It responds very quickly (almost instantly) to commands and once I got the gist of setting up scenes I had a welcome home light scene programmed as well as a daily lighting routine programmed and running in about 5 min.
My delight with the Geofencing capability was reaffirmed as we went to family dinner and upon leaving, getting the notification from the Vera App that we had indeed left the building and the required lights were on and the other lights in the Welcome Home Scene will be turned on as we return. (Geofencing is very cool! My exposure to device aware programming during my Control 4 stint was with automatically turning on lights in a house, unlocking the front door, and activating motion sensors on other light switches in the hose initiating lights to turn on and off as someone comes in the door and then leaves the line of sight of the sensors.)
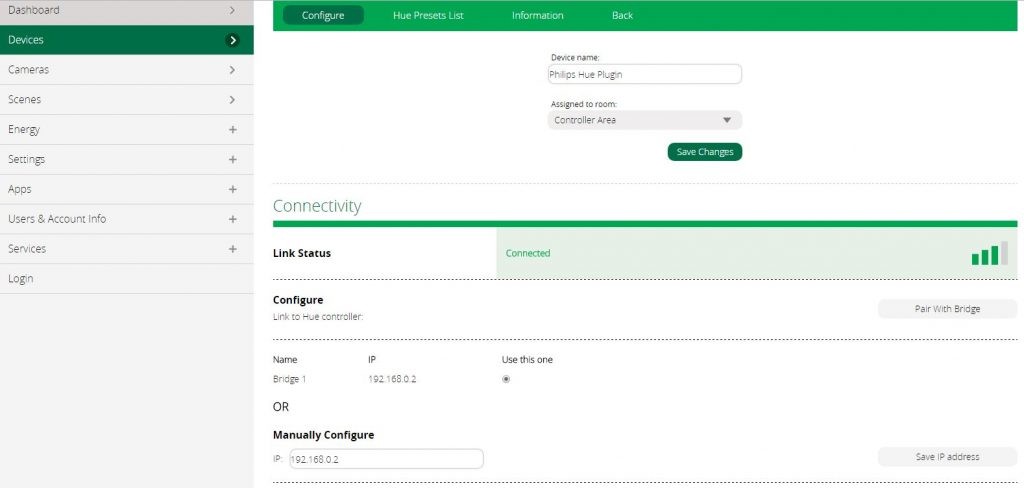
Initially I did have some issues with pairing the Hue Bridge with the Hue branded app, and after a couple of internet Google searches, I came across a post that the Hue branded app wasn’t receiving updates, but that the Vera Hue app was easy to configure and pair with manual configurations. With that said- I uninstalled the Hue app from Vera and installed the Vera Hue app that has this nondescript icon, looked into my router table to get the local IP address and bang! Ten seconds later, Vera is conversational with Hue and they can now interact with each other like a new couple on their first date!

I will go over how I created scenes and how I installed the devices with the Vera Hue app in more detail in a separate post.
My only quarrel with the Vera app is that it isn’t very compact inside the UI. It almost seems sprawled out and there’s lots of scrolling. Could use someone like me to help update the UI flow like I am doing for TCKSports.com. I like how the app and the dashboard are very responsive, however the app is like the Readers Digest Large Print edition of apps and could use some condensing and rearranging. I may mock up my ideas and post here in the future as well.

What are we planning to do next?
Next things we have planned are integrating our camera system with the Vera Plus, subscribing to monitoring with Vera and door locks. I need door locks that are Z-Wave capable and that I can control with the app as well as a key for backup. Vera has some on clearance which I will be purchasing shortly!
I wlll be updating this as we add, edit, and delete components from our smart home system(s) and I’m looking forward to more adventures in home automation.